
Jelly Custard Trifle: A Sweet Symphony of Flavors
Imagine a warm summer afternoon, the sun spilling golden light over a table adorned with cheerful plates and laughter echoing in the background. The aroma of sweet vanilla mingles with the fruity scent of fresh berries, creating an atmosphere brimming with comfort and joy. That’s the magic of a Jelly Custard Trifle—an indulgent dessert that brings together layers of happiness in a delightful cup. This treat is perfect for family gatherings, festive celebrations, or simply a cozy night in. Let’s dive into this Jelly Custard Trifle recipe that’s as beautiful to behold as it is delicious to savor.
Why You’ll Love This Recipe
This Jelly Custard Trifle isn’t just a dessert; it’s a context for creating memories and bonding over flavors that warm the heart. Here’s why you’ll adore this recipe:
- Comforting Layers: The creamy custard contrasts perfectly with the fruity jelly, making each bite a delightful experience.
- Quick and Easy: With simple steps, you can have this dessert ready in no time, perfect for those busy evenings.
- Family-Friendly: Kids and adults alike can’t resist the colorful layers; it’s a shared joy at the dinner table.
- Versatile Treat: You can easily switch up flavors and textures, making it a dish that adapts to any occasion.
- Festive Flair: Presenting it at parties adds a touch of elegance, turning any meal into something special.
Ingredients
To whip up this delightful Jelly Custard Trifle, you’ll need the following ingredients:
- Custard: Rich and creamy, this classic brings a velvety charm to your trifle.
- Jelly: Choose your favorite flavor—strawberry, raspberry, or even a tropical mix for a fun twist.
- Ladyfingers or Cake: Light and airy, these form the base layers. You can substitute with gluten-free options if needed.
- Fresh Fruits: Strawberries, blueberries, or bananas add a refreshing crunch and natural sweetness.
- Whipped Cream: A dollop on top adds an extra touch of indulgence.
For substitutions, consider using almond milk for a dairy-free option or coconut cream for a vegan alternative.
Timing
- Prep Time: 20 minutes
- Cook Time: 10 minutes (for the custard)
- Total Time: 30 minutes plus chilling time
You’ll have this indulgent dessert ready faster than takeout, offering a satisfying payoff that will have your loved ones coming back for seconds!
Step-by-Step Instructions
- Begin by preparing the custard. In a medium saucepan, combine milk, sugar, and vanilla extract, and heat over medium until steaming but not boiling.
- In a separate bowl, whisk together the eggs and cornstarch until smooth.
- Slowly add the warm milk mixture to the egg mix, whisking constantly to prevent curdling. Return the mixture to the saucepan and cook until it thickens—your kitchen will smell amazing at this point!
- Remove from heat and let it cool, stirring occasionally.
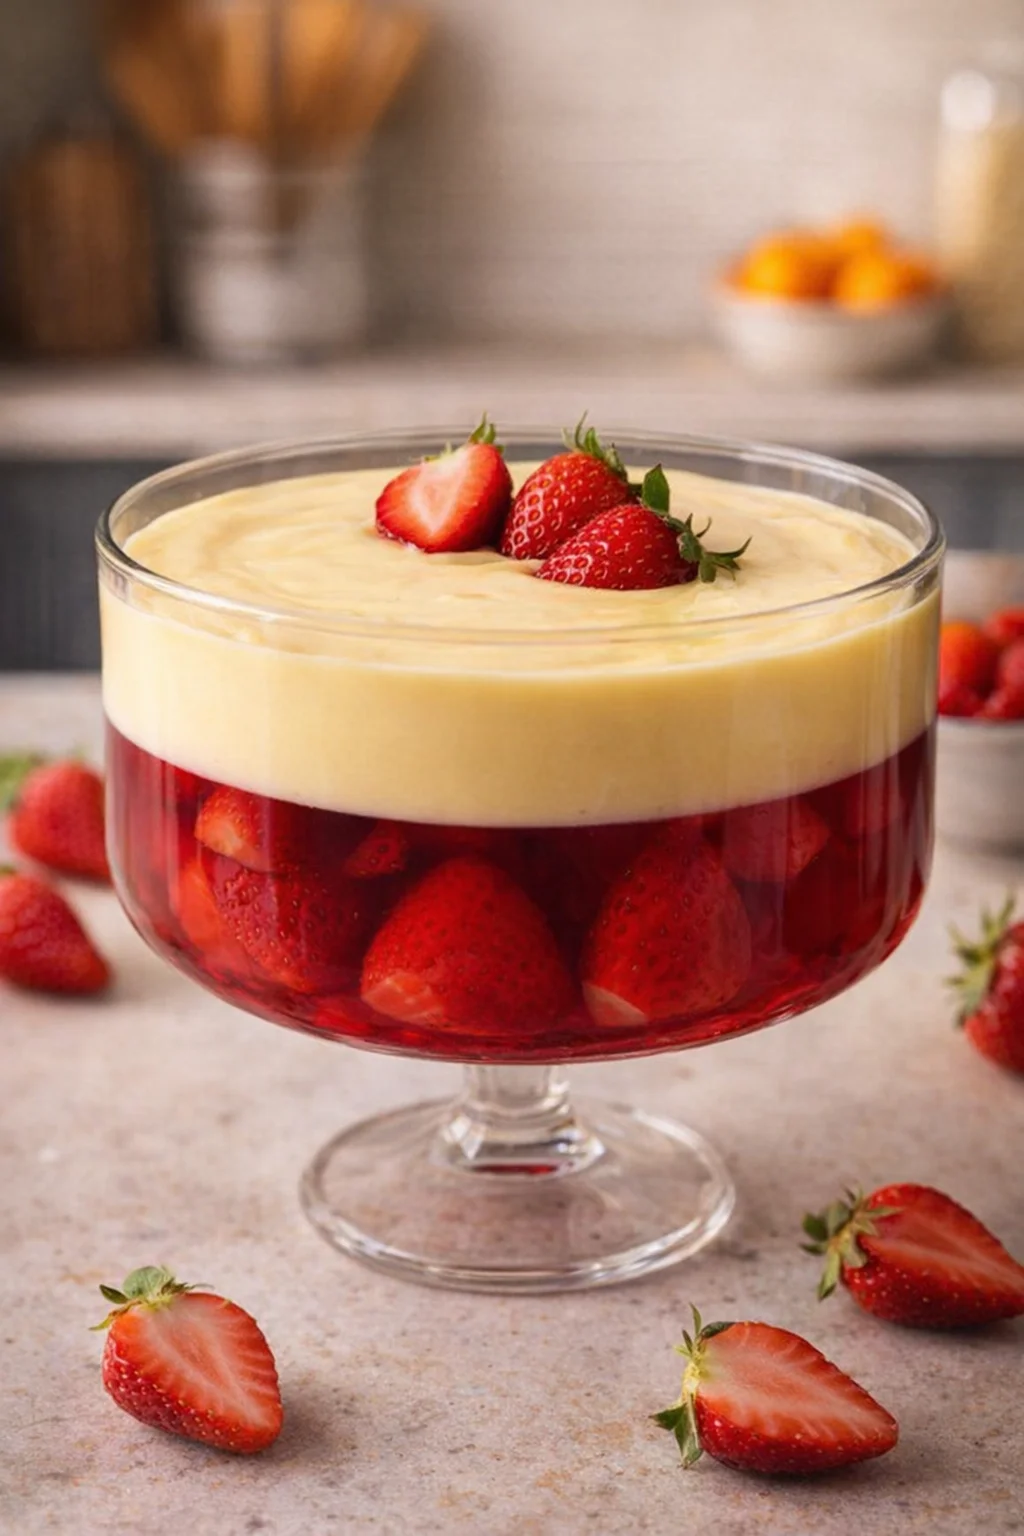
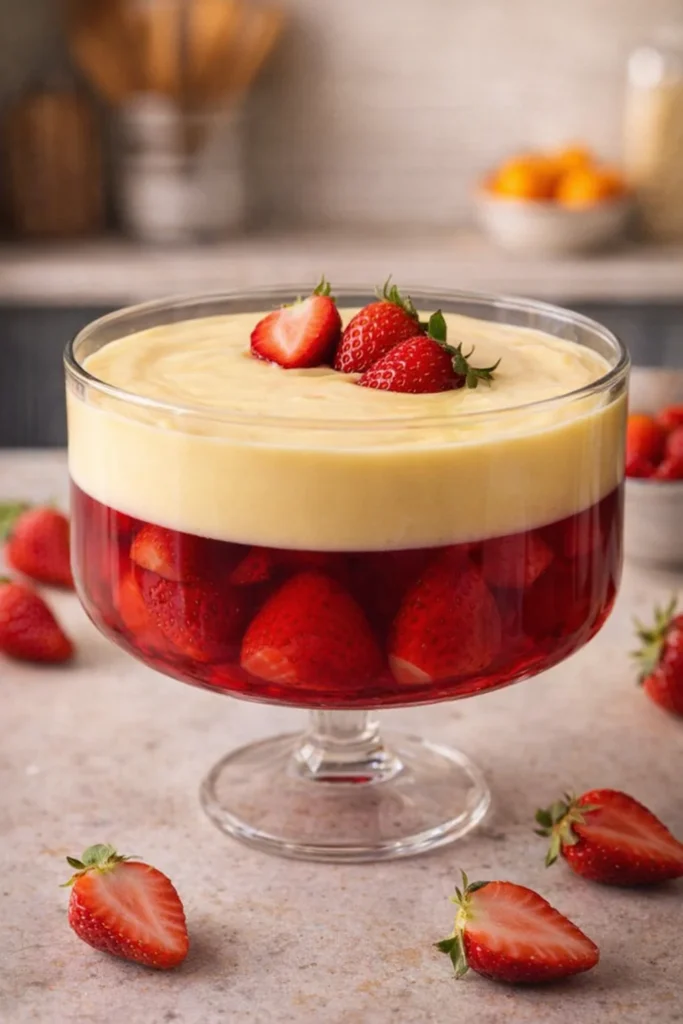
- As the custard cools, prepare the jelly according to package instructions, pouring it into a clear glass dish and allowing it to set in the fridge.
- Once the jelly is firm, cut it into cubes.
- In your serving glasses, layer the cake or ladyfingers, followed by custard, jelly, and fresh fruits. Repeat until the glasses are full, finishing with a layer of whipped cream on top.
- Chill the trifle in the refrigerator for at least 1 hour before serving to let the flavors meld.
Tips and Variations
Feel free to get creative with this Jelly Custard Trifle. Here are some ideas:
- Flavor Twists: Try pairing chocolate custard with orange jelly for a unique flavor profile.
- Healthier Options: Substitute sugar with honey or agave syrup and use low-fat yogurt instead of cream for a lighter version.
- Festive Layers: Add seasonal fruits or even a splash of liqueur for adult gatherings; think raspberry liqueur paired with vanilla custard!
Serving Suggestions
Picture serving this trifle with a warm cup of tea or coffee as the sun sets, each spoonful bursting with flavor and cheer. It complements a casual family dinner or a festive meal beautifully, making every gathering feel special.
Storage and Make-Ahead Tips
The best part about this Jelly Custard Trifle is that it’s a great make-ahead option! Store any leftovers covered in the refrigerator for up to 3 days. Just a gentle stir before serving will refresh the layers. If you plan to enjoy it later, assemble the layers (excluding the whipped cream) and store them separately, adding the cream just before serving to keep that magnificent fluffiness.
Pro Tips from the Kitchen
- For a silkier custard, use a fine-mesh sieve to strain it after cooking.
- Always let the jelly set fully before assembling to avoid any messy layers.
- If you find your custard is too thick, whisk in a splash of milk for a creamier consistency.
- Invest in clear glasses for serving; showcasing the vibrant layers elevates your presentation.
FAQs
1. Can I make this trifle a day ahead?
Yes! In fact, making it a day ahead allows the flavors to meld beautifully. Just hold off on adding whipped cream until you’re ready to serve.
2. What if I don’t have ladyfingers?
You can use sponge cake, pound cake, or even a gluten-free cake as a substitute.
3. How can I make this dish more festive?
Consider using seasonal fruits or adding a splash of flavoring, like vanilla or almond extract, to your custard.
4. Can I freeze the trifle?
While you can freeze individual components, assembly is best done fresh as freezing could alter the texture.
5. Is it possible to make a lower-calorie version?
Absolutely! Reducing sugar, using low-fat milk, and opting for lighter whipped toppings can create a healthier indulgence.
Conclusion
This Jelly Custard Trifle is more than just a dessert; it’s a celebration of flavors, a source of comfort, and a wonderful way to create lasting memories with family and friends. So grab your ingredients, put on your apron, and be prepared to turn a simple gathering into an extraordinary experience. Enjoy every layer, from the creamy custard to the fruity jelly, and appreciate the joy it brings to your table. Happy baking!
Jelly Custard Trifle
Ingredients
Method
- In a medium saucepan, combine milk, sugar, and vanilla extract over medium heat until steaming but not boiling.
- In a separate bowl, whisk together the eggs and cornstarch until smooth.
- Slowly add the warm milk mixture to the egg mix while whisking constantly to prevent curdling.
- Return the mixture to the saucepan and cook until it thickens.
- Remove from heat and let it cool, stirring occasionally.
- Prepare the jelly according to package instructions and pour into a clear glass dish, allowing it to set in the fridge.
- Once set, cut the jelly into cubes.
- In serving glasses, layer the ladyfingers or cake, followed by custard, jelly, and fresh fruits.
- Repeat the layers until the glasses are full and finish with a layer of whipped cream on top.
- Chill the trifle in the refrigerator for at least 1 hour before serving.